
Frozen Birthday Invites

Since Melody’s birthday was dramatically smaller this year, I only had to make 4 invitations to mail out. I did make six in the end so that I would have some extras to store away. I debated between store bought, store printed, or DIY at home. And since I didn’t have to make as many, I opted for DIY. Plus the date was decide about 10 days out, ha!
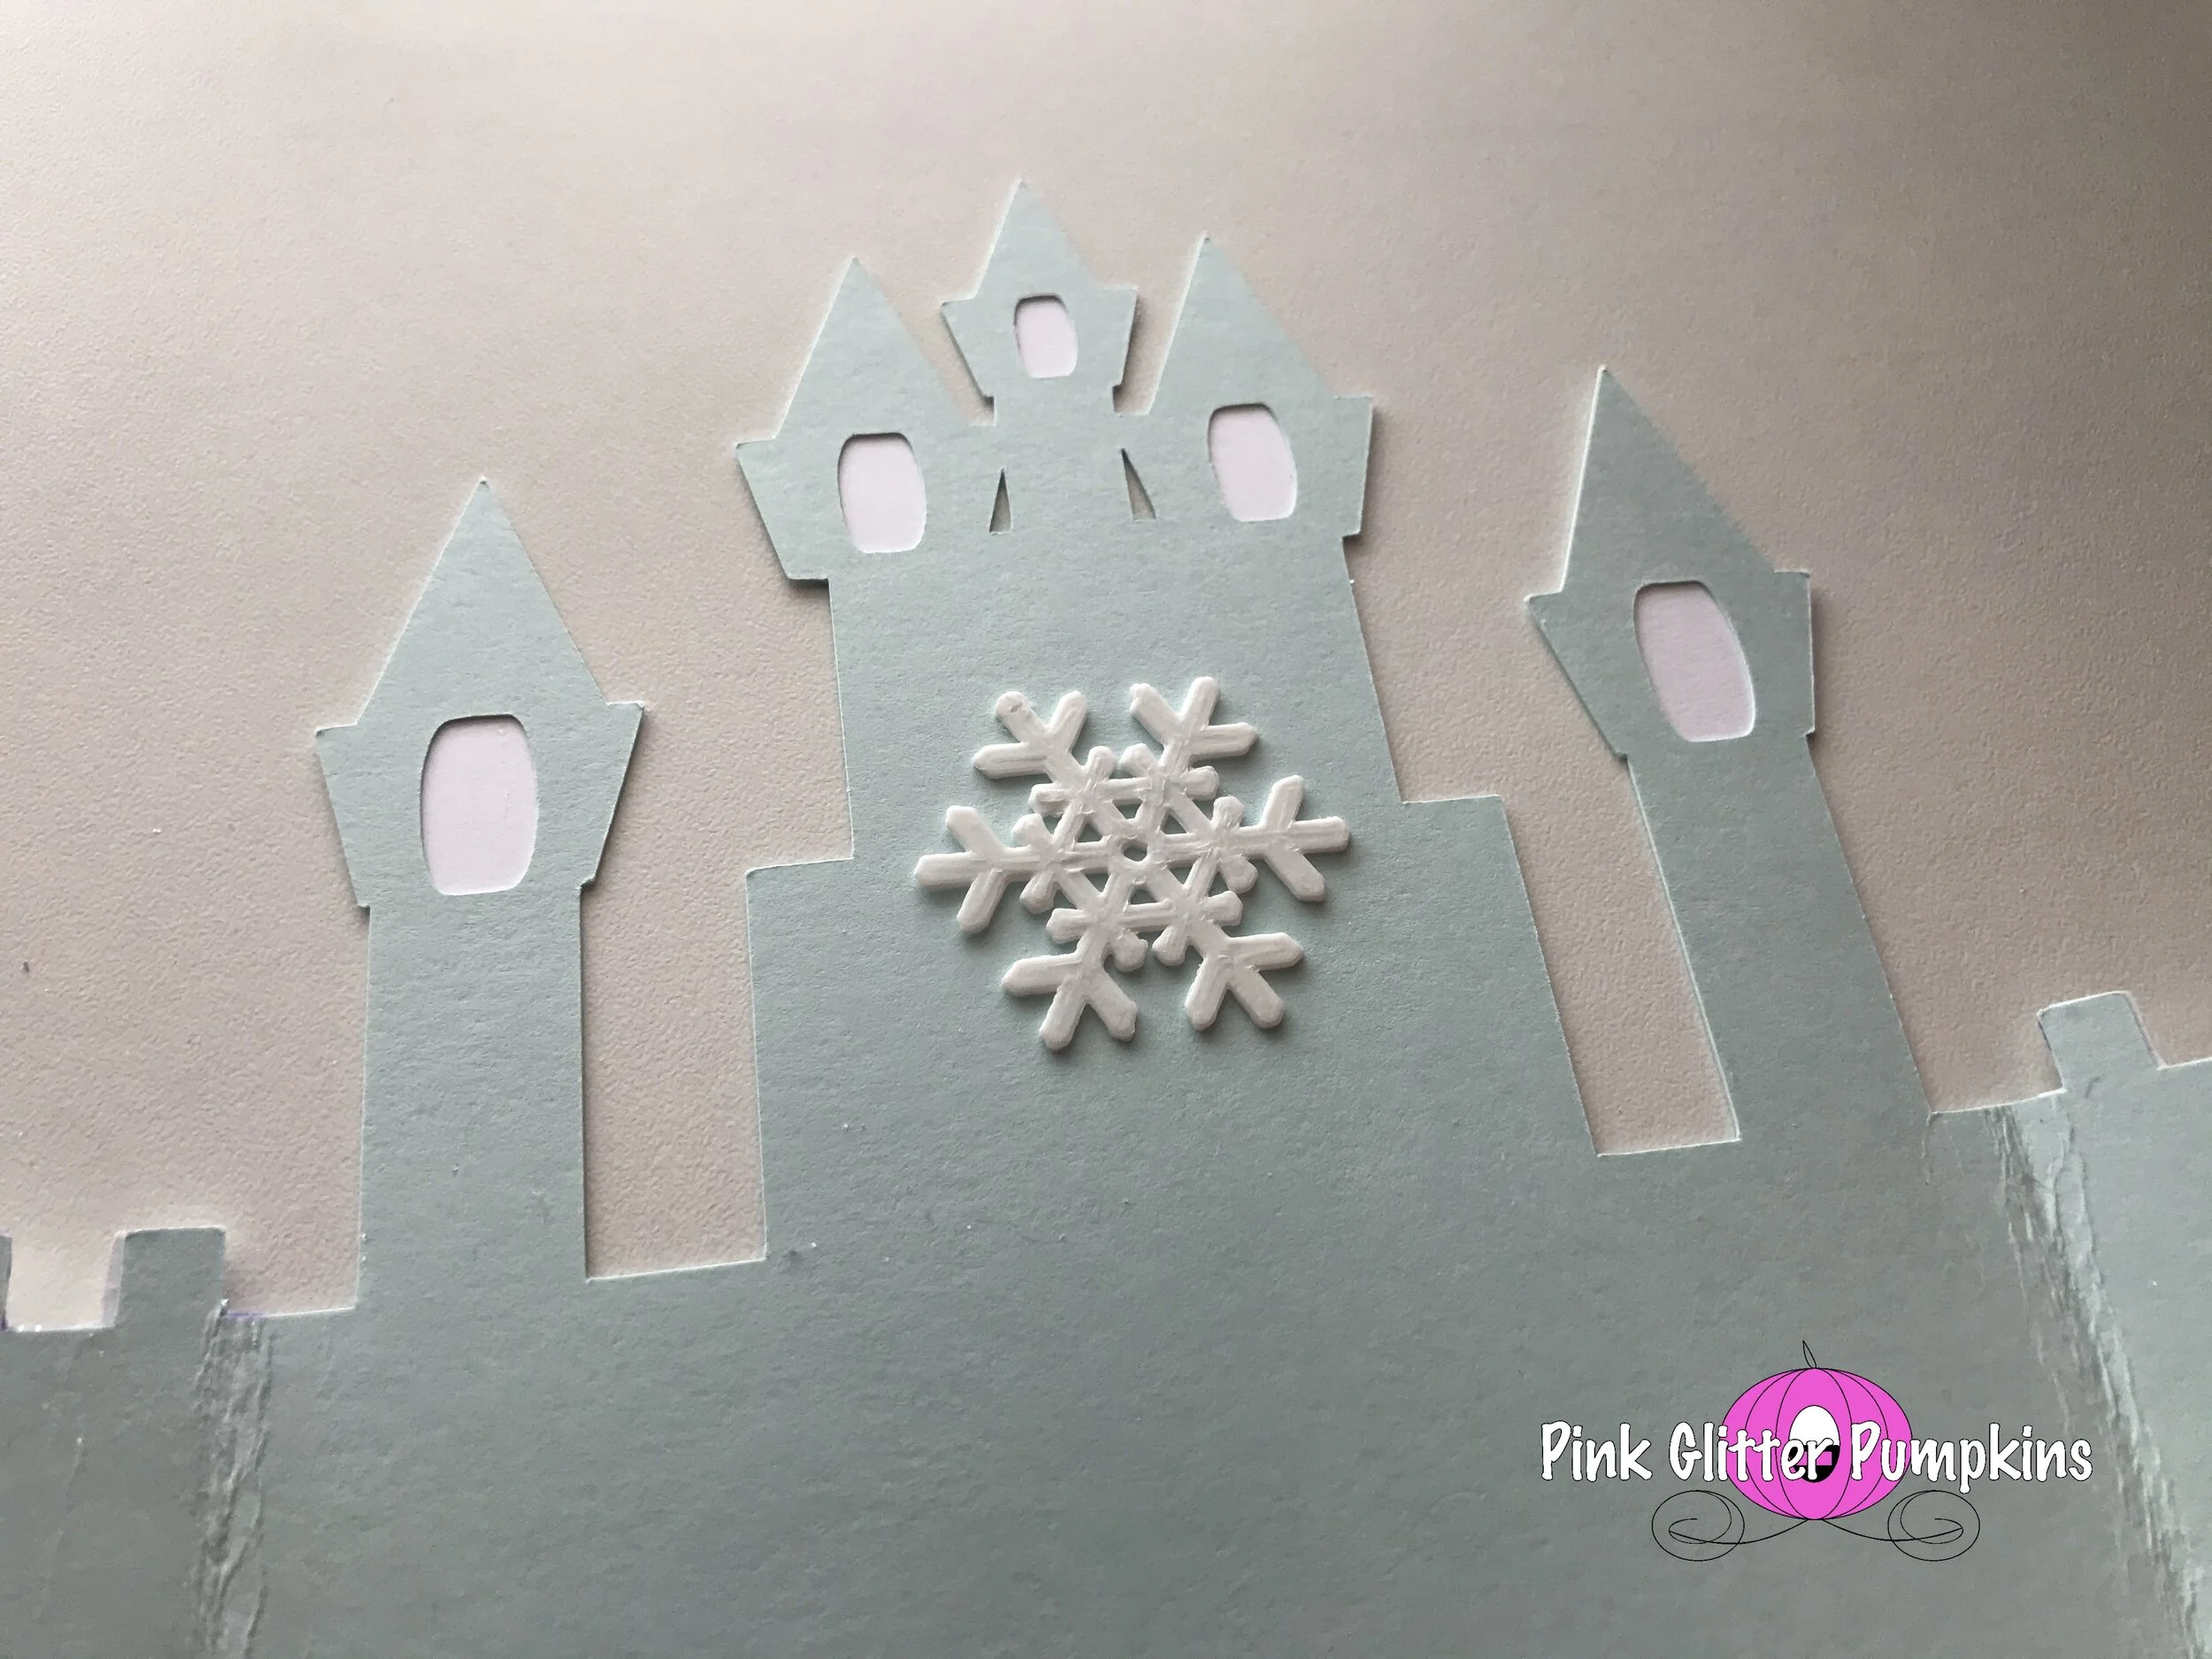
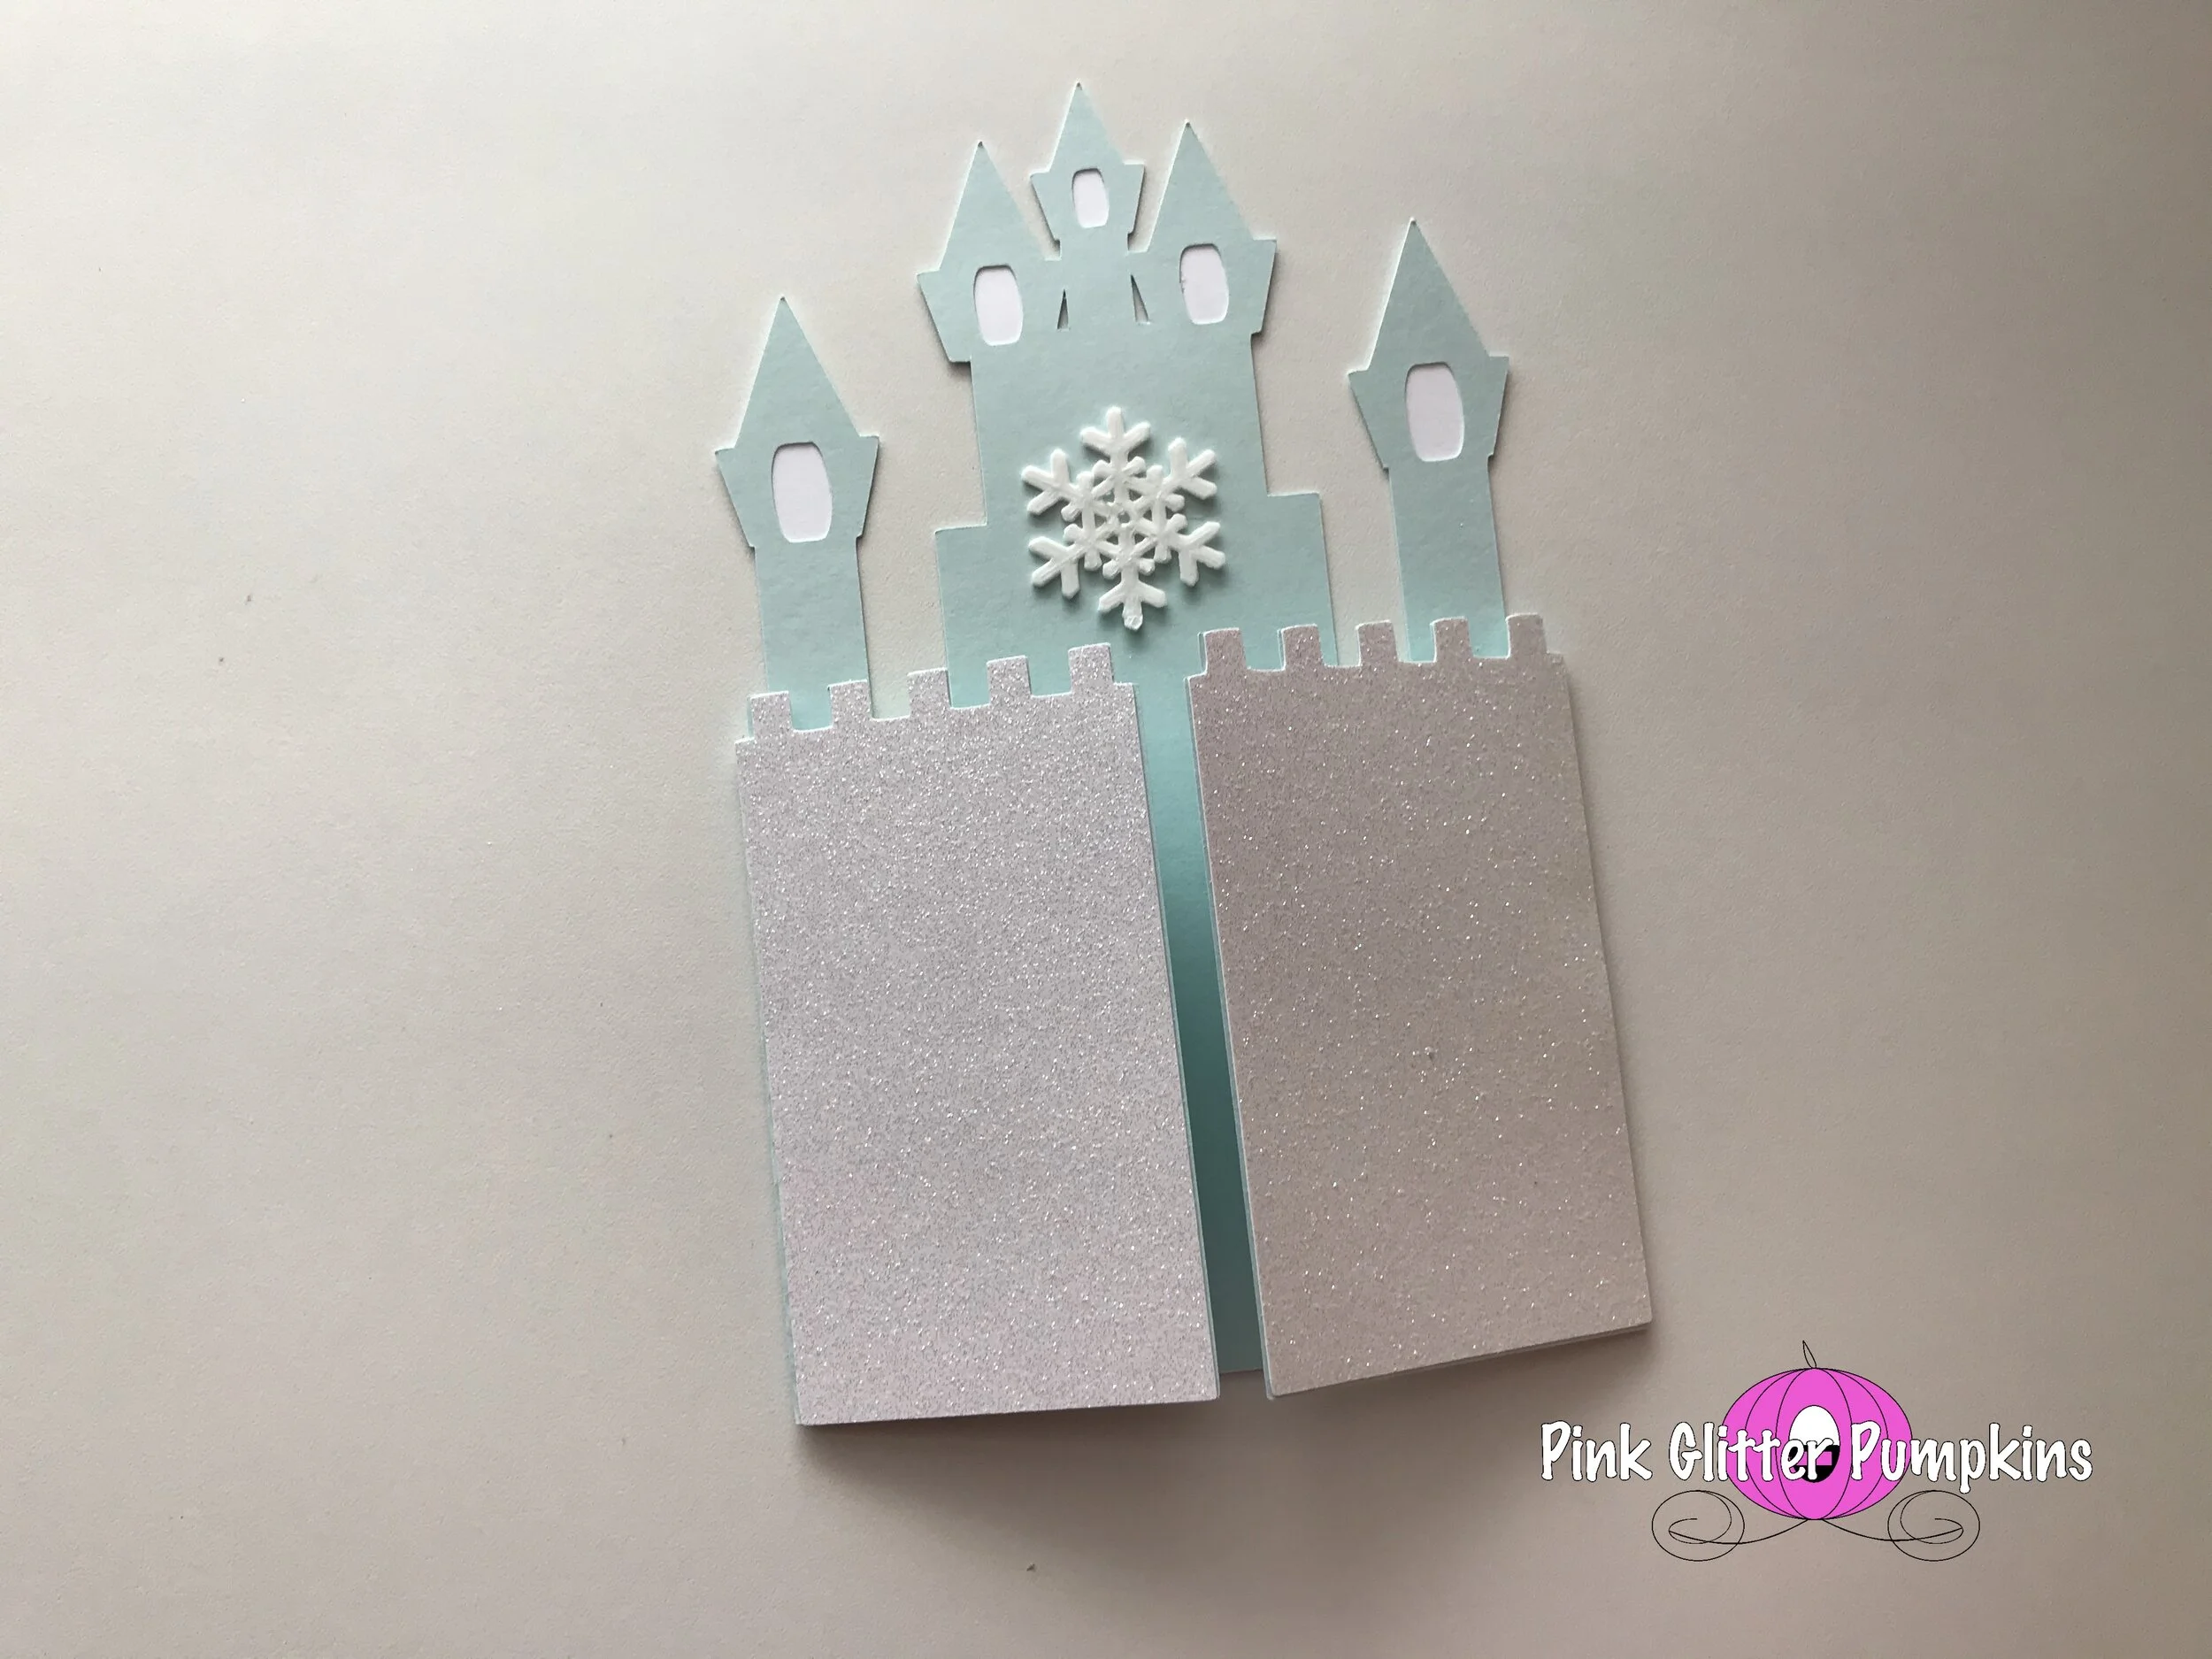
With the theme being Frozen, I wanted to incorporate Frozen somehow. I made a few different drafts along the way. I knew I wanted to do the castle as the actual invite, and I designed this using my Silhouette Cameo. I tried making the front shiny using adhesive vinyl and use stickers to add the Elsa and Anna. I made the insert on my first invite and didn’t change it during any of the drafts. My first draft at the castle being the front and the back and I would also incorporate a 3D printed snowflake. Then I decided to make the castle the center and have a “stone wall” open and close to the castle. I also added windows. I added a white background to the windows and also to the stone wall. In my mind, the stone wall would be glittery somehow. I really wanted to incorporate the snowflake, so we messed around with placement and sizes. I also messed around with the windows and trying to make it look like snow was falling, but it just didn’t work.


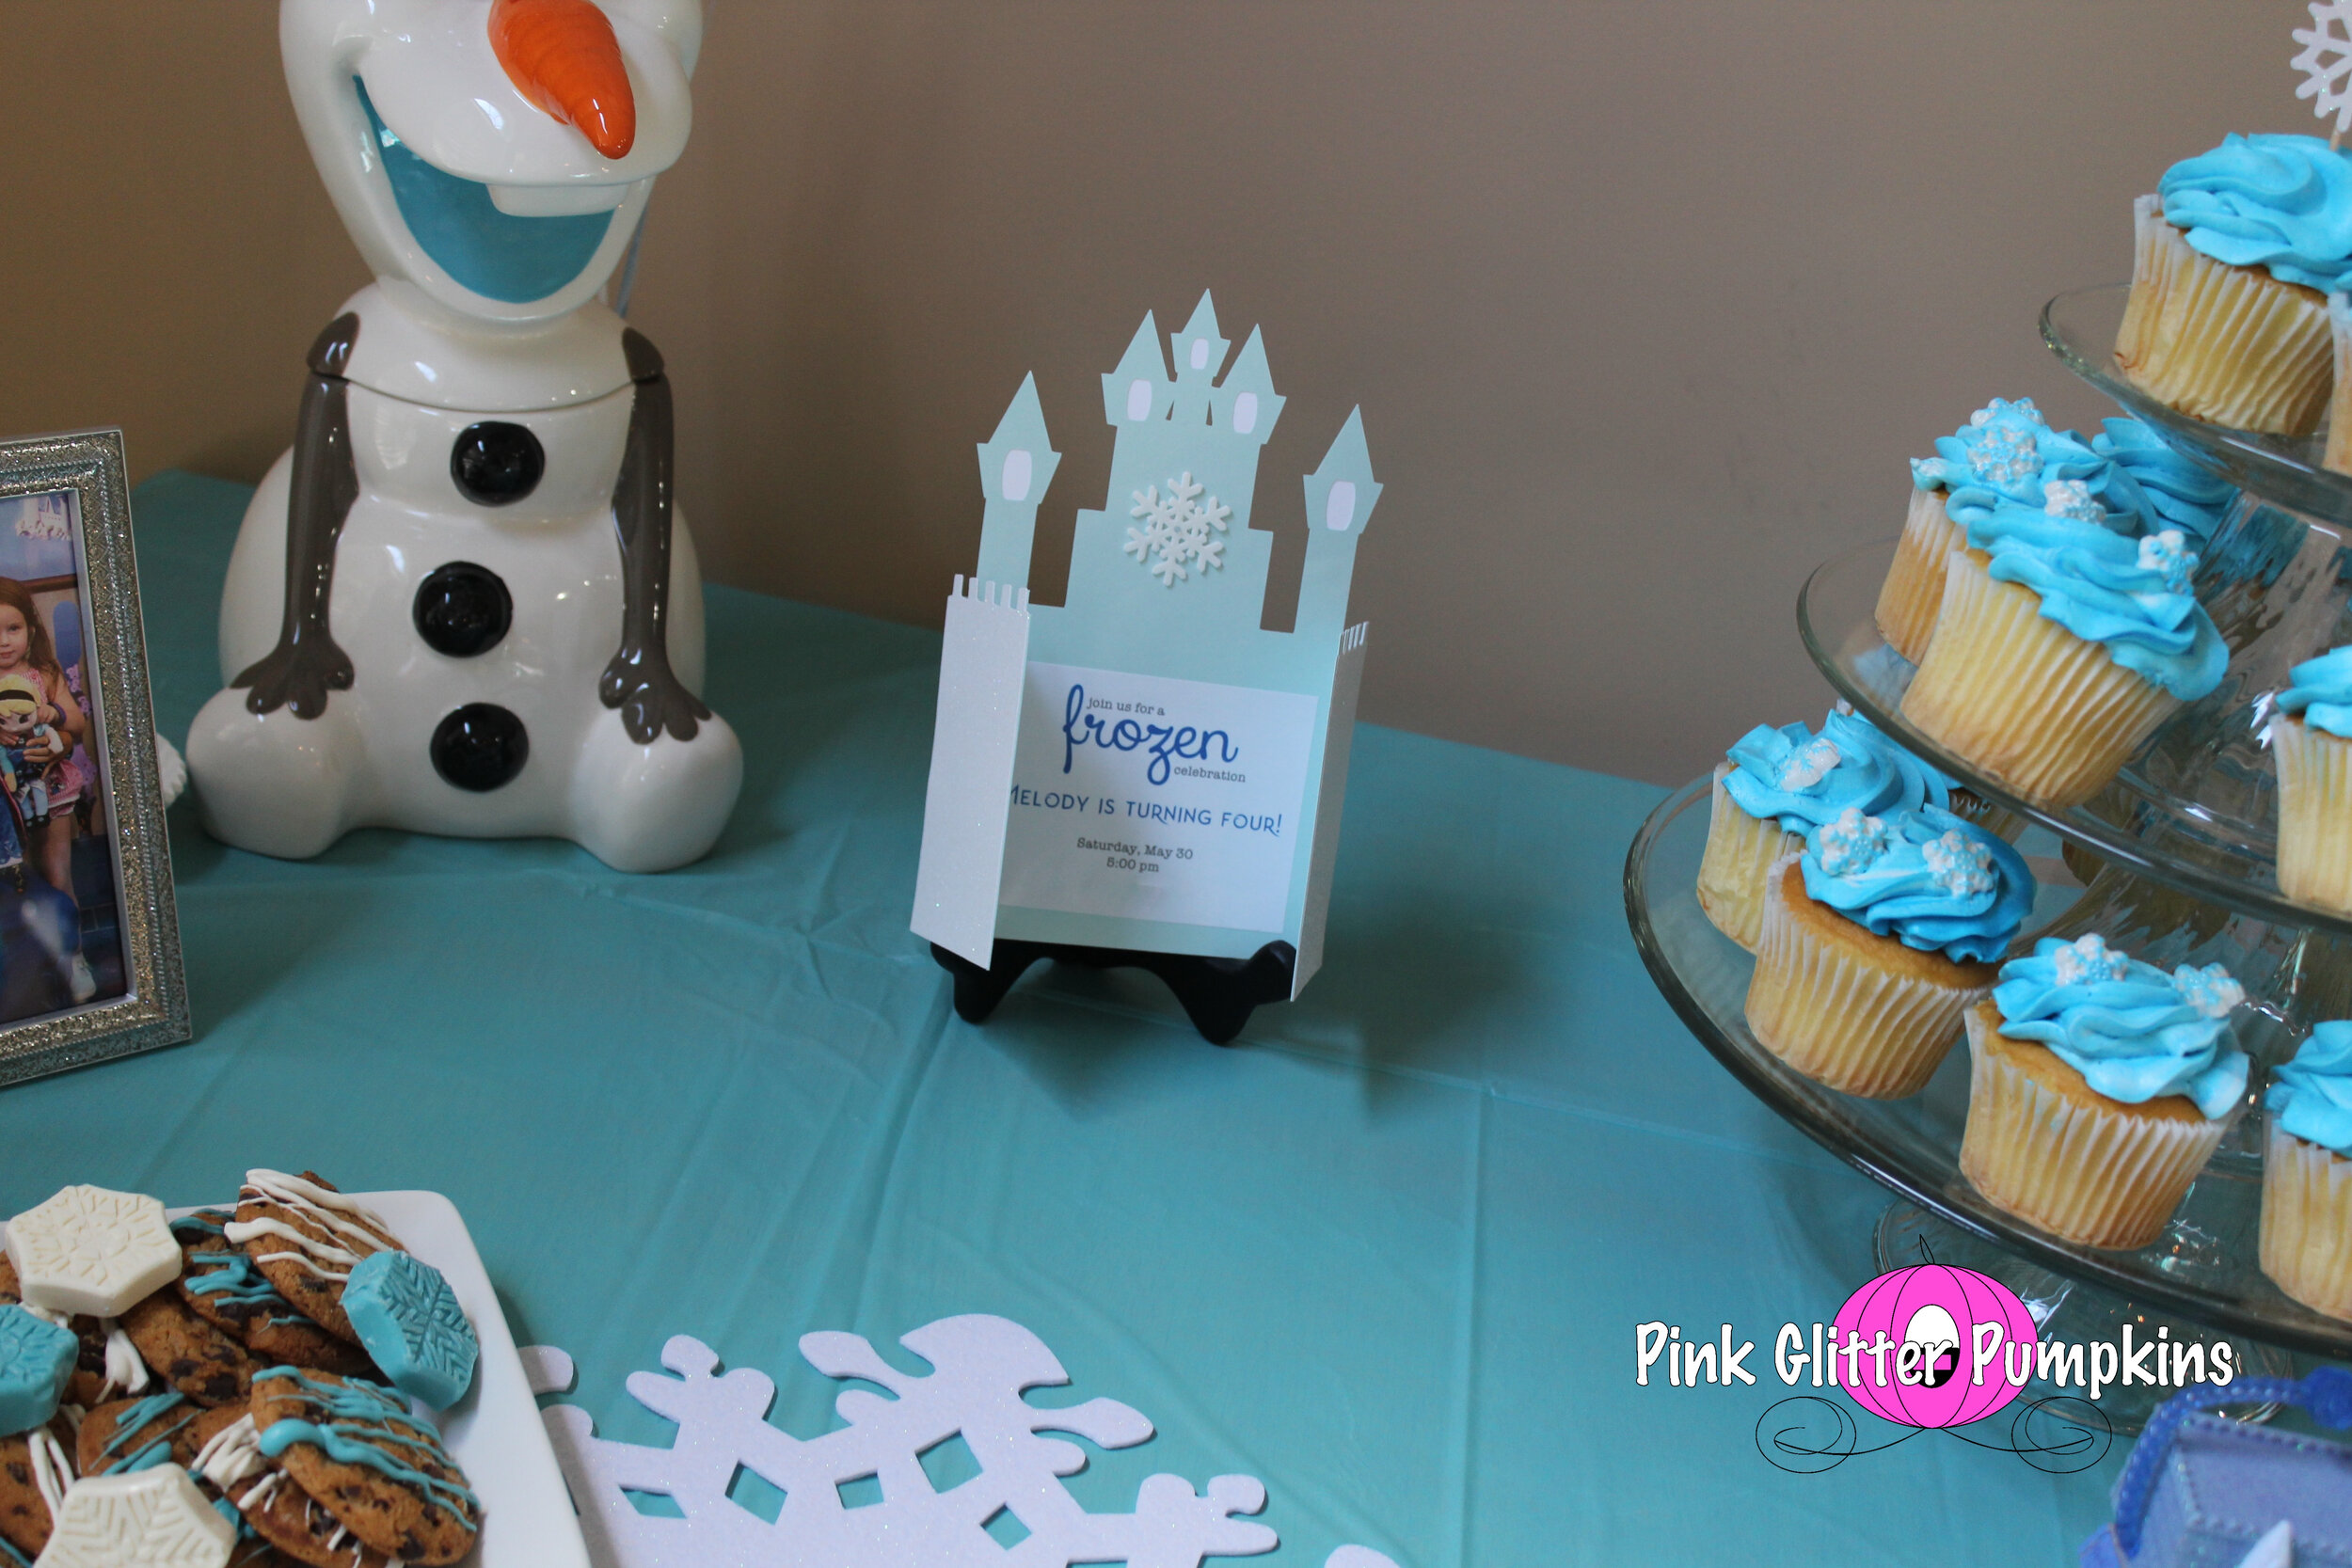
Here is the end result and the assembly!

On the back of the castle, I glued the white window pieces on. While this isn’t pretty to look at on the back, it was easier. And ideally you aren’t looking at the back.

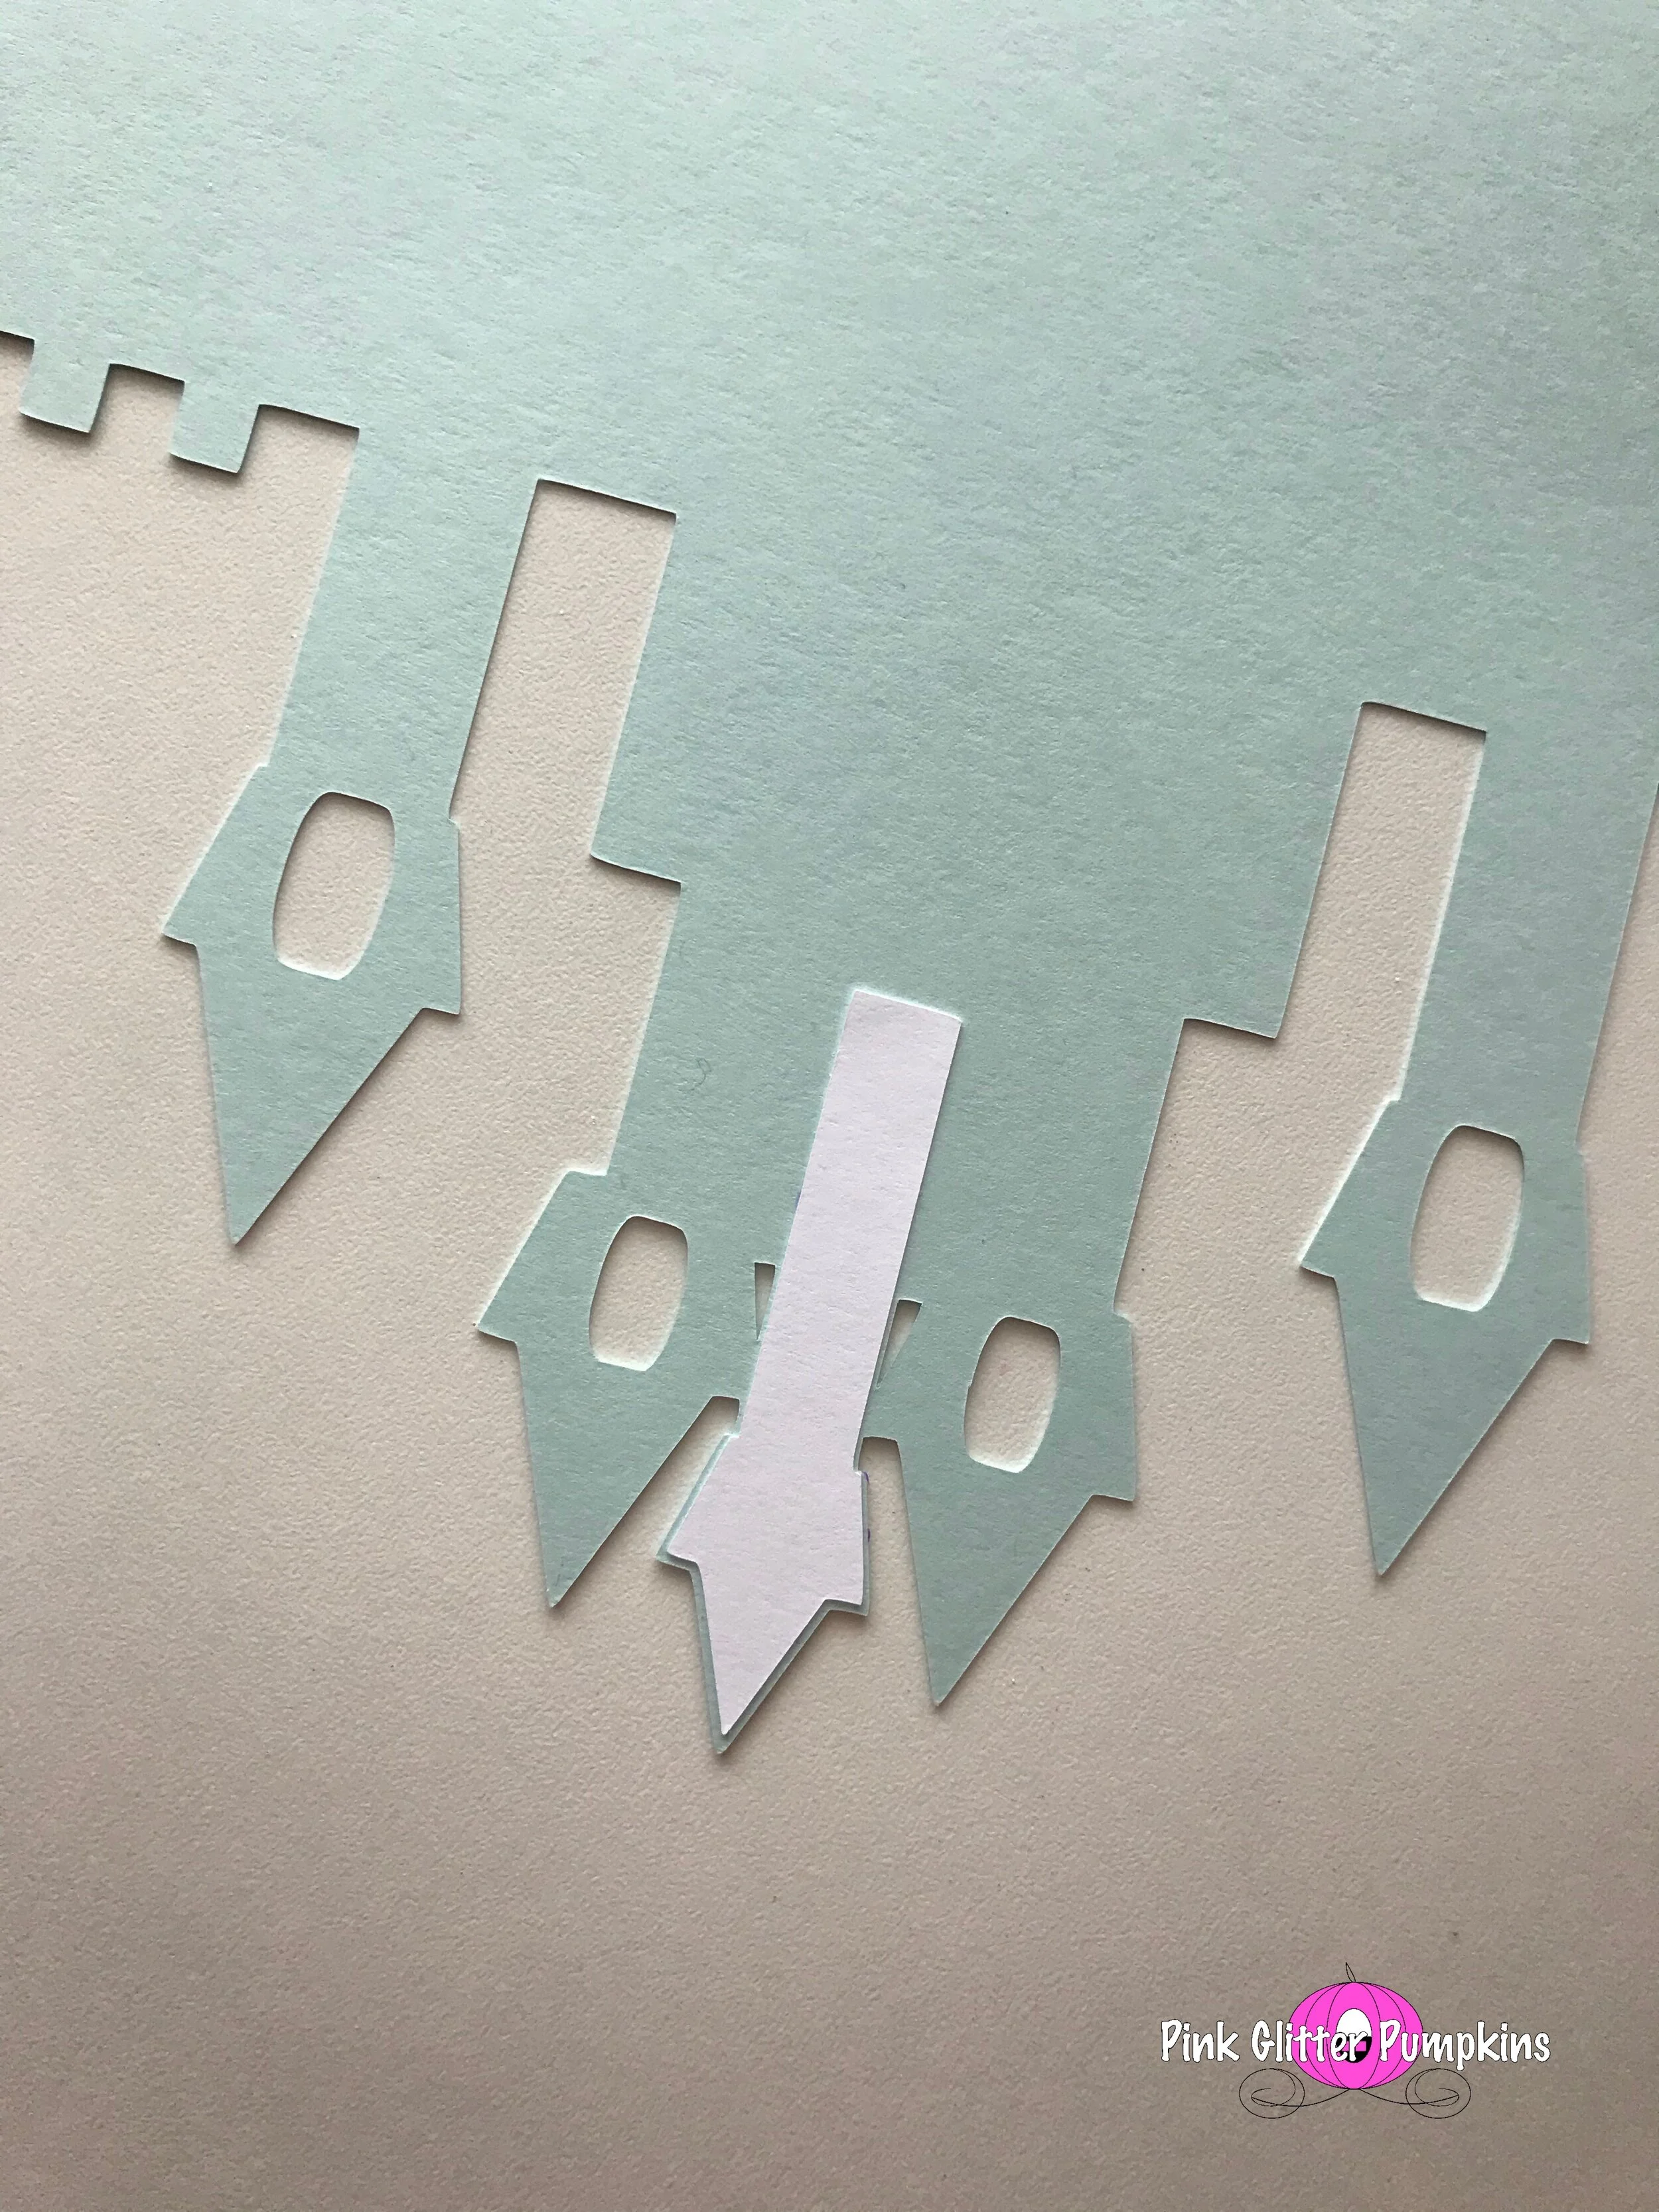


Once dried, I flipped over and folded the stone walls inwards. Then I glued on the glitter yardstick.


Brad used his 3D printer to print some snowflakes to be the outside center of the castle. I used hot glue to attach these. Word of advice, if you do something like this, do not attach the hot glue to the 3D printed object. It will melt it. Instead attach it to what you are glueing it to (the invite), then place the object on the item.


I let all of this dry overnight. I did these before I decided the actual date. Then once I confirmed the date, I printed the inserts.

I simply printed the inserts on regular copy paper. Then I used a paper cutter to cut them, and I glued them onto the invite.


And all done! These were probably my favorite invite. Which really stinks since so few people received one!